A DIY baby photoshoot always seems like it would be fairly easy, yet something was never quite right with the shots I took. They were either too dark, too cluttered, or just plain 'off'. Sound familiar?
After diving deep into professional techniques and testing them with my own camera (and let's be honest, mostly my phone), I think I've cracked the code on getting those great baby photos. I turns out that the secret isn't expensive equipment, it's knowing a few key tricks that the pros use every single day.
Why Most DIY Baby Photos Fail
Before we jump into the how-to, let's talk about why most DIY attempts fall flat. It's usually one of three culprits:
- Terrible lighting (that harsh overhead light is not your friend)
- Visual chaos in the background
- Bad timing (trying to photograph a fussy baby is like being in a goat rodeo)
But don't worry, all of these are totally fixable once you know what to look for.
What You Actually Need
Forget the fancy equipment lists. Here's what actually matters:
Essential:
- Any camera or smartphone (yes, your phone will work)
- A large window with natural light
- A few simple blankets or sheets
- Patience (this is probably half the battle)
Nice to have:
- White sheet for diffusing light
- Simple props like a plain onesie or soft wrap
- A partner to help wrangle baby
The Magic Formula for DIY Photoshoots
The biggest game-changer in baby photography isn't a $2,000 lens – it's understanding light. Professional photographers obsess over it for a reason.
Finding Your Light Source
Walk around your house with your camera during different times of day. Take test shots of a stuffed animal or doll in various rooms. North-facing windows provide consistent soft light, but any window works if the sun isn't blazing directly through.
The Sweet Spots:
- Mid-morning to early afternoon (10 am - 2 pm)
- Near large windows or sliding glass doors
- Rooms that get indirect light (not harsh direct sunlight)
Pro tip: If your light is too harsh, hang a white bedsheet in front of the window as an instant professional diffuser.
Step-by-Step: Setting Up Your Shot
Here's a basic setup to have the perfect DIY photoshoot stage so you're not having to edit dirty socks out of the background of the perfect baby photo.
1. Prep the Space (5 minutes, max)
Grab a laundry basket and throw in all the visual clutter – mail, random toys, that pile of clean (or dirty) laundry you've been avoiding. Your background should be clean and simple. A plain blanket or sheet works perfectly as a backdrop.
If you have a dog or cat, they will decide to lick their butt in the background of each and every shot. It's inevitable, so just roll with it.
2. Get Baby Ready
This is where timing becomes crucial. The best baby photos happen when:
- Baby is fed and has a clean diaper
- Room temperature is warm (75-80°F)
- You have white noise playing
- Baby is swaddled if they're under 2 weeks old
- Avoid busy patterns or elaborate outfits that overshadow the baby.
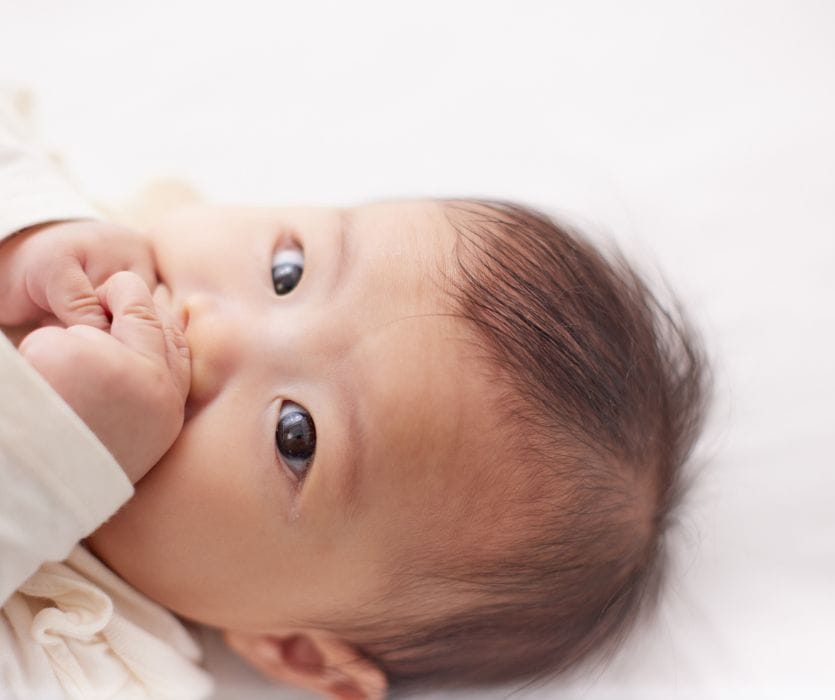
For newborns (under 2 weeks): Aim for sleeping shots. They're much easier and frankly, more adorable.
For older babies: Capture them when they're alert but content – usually right after a feeding.
Note: safety comes first - never attempt complex poses you see on Pinterest. Professional poses often require Photoshop compositing and specialized training. Keep babies on secure, flat surfaces.
3. Position Everything
Place your baby on a soft surface about 2-3 feet from your backdrop. This creates depth and prevents that flat, "pasted on" look.
The angle matters: Never shoot from below (hello, unflattering nostril shots). Instead, position yourself slightly above or at your baby's eye level. This is why floor shots are great, plus, as my pediatrician loves to say, "no one has ever fallen off the floor".
Camera Settings That Actually Work
Here are a few tips and tricks from the trade for phone and camera settings.
Smartphone Users:
- Turn OFF the flash
- Tap the screen to focus on baby's face
- Use portrait mode if you have it
- Try the 2x zoom for detail shots
DSLR Users:
- Use the largest aperture your lens allows (f/1.8, f/2.8, etc.)
- ISO 400-800, depending on available light
- Focus on the eyes
Foolproof compositions:
Stumped on what might make a good shot? Here's some inspiration.
✅ Detail Shots: Those tiny fingers, toes, ears, and eyelashes. Get close and fill the frame.
✅ Overhead Shots: Position yourself directly above baby. (Try not to drop your phone on the baby. Not that I know anything about this ::cough::) This angle is incredibly flattering and eliminates background distractions.
✅ Eye-Level Shots: Get down on baby's level. For tummy time shots, lie on the floor with your camera.
✅ Environmental Shots: Pull back to show the baby in their nursery or on your bed. Include some of their world, but keep it simple.
Working with Different Ages
Different stages often lend themselves to different set ups.
Newborns (0-2 weeks): Focus on sleeping shots. Swaddle tightly and use simple wraps. The goal is to capture how tiny and peaceful they are.
Older Babies (2+ weeks): You can capture more personality – those wide-awake eyes, little smirks, and alert expressions. Use toys or sounds to get their attention, but be ready to shoot quickly.
Mobile Babies: Embrace the movement. Some of the most charming photos happen when babies are naturally interacting with their environment.
Don't Forget the Family
Set up your phone on a shelf or dresser, use the timer function, and get in the frame. Your baby will treasure these photos of you together someday, even if you don't feel camera-ready.
Safety note: When including siblings, prioritize safety over the shot. Have adults support the baby at all times. You don't want a family story about that one time your toddler dropped your newborn.
Common Mistakes (And How to Fix Them)
Sometimes a photo just doesn't look 'great'. Here are the most common pitfalls.
🛑 Too Dark: Move closer to your light source or increase your camera's exposure.
🛑 Too Busy: Simplify your background. When in doubt, use a plain white or cream blanket.
🛑 Blurry: Hold your breath when taking the shot, or use a faster shutter speed if you're using a DSLR.
🛑 Awkward Poses: Keep it natural. The most beautiful baby photos capture authentic moments, not forced positions.
The Edit That Makes All the Difference
You don't need Photoshop. The Lightroom mobile app (free version works fine) can transform your photos with basic adjustments:
- Brighten the exposure slightly
- Add a touch of warmth
- Increase clarity on baby's features
- Look for simple presets that enhance without over-processing
Managing Expectations
Here's the truth: you'll probably take 200 photos and love maybe 20 of them. (I mean, if it's your baby, you'll love them al,l but you know what I mean.) That's completely normal, even for professionals. The beauty of digital photography is that you can experiment without cost.
Some sessions will be complete disasters – baby will be fussy, the light will be wrong, or someone will poop (maybe you). Try again another day. Babies change so quickly that each attempt captures a different stage.
When to Call in the Pros
DIY photos are wonderful for everyday memories, but there are times when hiring a professional makes sense:
- You want elaborate poses that require safety training
- You need high-resolution images for large prints
- You want to be IN the photos as a family
- You have a specific artistic vision that requires professional equipment
A good photographer brings years of experience, professional editing skills, and most importantly, they handle all the technical stuff while you focus on enjoying your baby.
The Bottom Line
The best baby photos aren't about perfect technique – they're about capturing this fleeting time when your little one is impossibly small and every day brings changes, so don't get so caught up in getting the "perfect" shot.
Start with good light, keep things simple, and take way more photos than you think you need.
Did you try these techniques? I'd love to know which tips worked for you and which shots turned out to be complete disasters. Sometimes the disasters make the best stories later anyway.
Also check out: 240 Seasonal Captions for Baby Photos and Letterboards


Leave a Comment